How to Grow Collard Greens
Brassica oleracea var. viridis
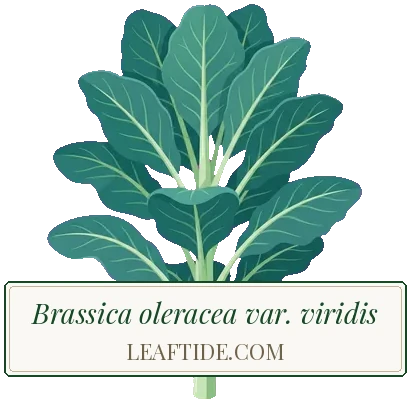
Collard greens are a hardy, heat-tolerant brassica for full sun and fertile, moisture-retentive soil. Sow from early spring or late summer for autumn and winter harvests. More heat-tolerant than kale, they thrive where other brassicas bolt. Harvest lower leaves regularly once they reach hand-size; frost sweetens the flavour. Cover with insect mesh to deter cabbage whites and aphids. Plants can produce for many months, cropping through winter in mild areas. Rotate beds to reduce clubroot risk.
 In your Leaftide garden
- Hardiness
- Hardy
- Season
- Cool Season
- Harvest
- Continuous Harvest
- Spacing
- 45 cm (18 in)
- Height
- 90 cm (35 in)
- Sow depth
- 1 cm (½ in)
- Min. soil temperature
- 7 °C+ (45 °F+)
- Start from
- Seed
- Light
- Full sun to part shade
- Water
- Moderate
When to Start
Direct sow outdoors as soon as soil reaches 7 °C (45 °F) — typically early to mid spring. Can also be started indoors 5 weeks earlier for a head start.
Don't know your frost date? Find it here →
Growth Stages
Approximate days from start
Care Essentials
- Nitrogen-rich feed at planting. Side-dress with compost monthly during growing season.
- Extremely nutritious and heat-tolerant. A staple of Southern US cuisine, more tolerant of heat and cold than most brassicas.
Companion Planting
Onions, Nasturtium, Dill
Growing Conditions
- Min. soil temperature
- 7 °C+ (45 °F+)
- Germination temperature
- 10–30 °C (50–86 °F)
- Sow indoors
- —
- Transplant out
- —
- First harvest
- —
Want your full season plan with reminders? Set up your garden free


Spacing & Planting
| Plant spacing | 45 cm (18 in) |
| Row spacing | 60 cm (24 in) |
| Sow depth | 1 cm (½ in) |
| Mature height | 90 cm (35 in) |
| Mature spread | 60 cm (24 in) |
Large plants need room to spread. Can plant closer (30cm, 12 in) for baby leaf harvests.
Companion Planting
Grows well with
- Onions
Onions are a common neighbour for collard greens, as their sharp smell is believed to put off cabbage family pests such as cabbage moths. Plant onion sets between the collard rows in spring; they stay small and leave the greens room to spread.
- Nasturtium
Nasturtiums are often used as a trap crop: aphids and cabbage white caterpillars tend to go for them first, which can spare the collard greens. Plant them a metre or so from the collards, and pull up badly infested plants before the pests move across.
- Dill
When dill flowers, its flat umbels feed small parasitic wasps that lay their eggs in caterpillars and aphids on collard greens. Dill runs to seed quickly, so sow a short row every few weeks from spring to keep flowers coming while the collards grow.
Keep away from
- Tomato
Collard greens and tomatoes are traditionally said to inhibit each other, and tall tomato plants would shade the collards in summer. Plant them in different beds and stake the tomatoes so they don't sprawl into neighbouring crops.
- Strawberry
Strawberries and brassicas, collard greens included, are said in traditional planting lore to inhibit each other's growth. Keep strawberries in a permanent bed of their own and grow collards in your brassica rotation, at least a bed's width away.
Pests & Diseases
Pest Cabbage Caterpillars
Identification: Holes chewed in the leaves, often with green droppings in the leaf bases. The culprits are yellow-and-black hairy caterpillars of the large cabbage white feeding in groups, velvety green caterpillars of the small cabbage white, loopers that arch their backs as they move, and small diamondback moth caterpillars that wriggle and drop on a silk thread, leaving see-through window-pane patches.
- Cover plants with fine insect mesh from planting to stop egg laying
- Check leaf undersides every few days and pick off eggs and caterpillars
- Spray young caterpillars with Bacillus thuringiensis (Bt) where it is approved for home use
Pest Mealy Cabbage Aphid
Identification: Dense colonies of grey, waxy-coated aphids under the leaves and in the growing tip, with curled, yellowed leaves and sticky honeydew. Often worst in autumn.
- Wash colonies off with a strong jet of water or rub them off by hand
- Remove the worst-infested leaves
- Spray with insecticidal soap, reaching under the leaves and into the tip
Pest Cabbage Whitefly
Identification: White-winged insects about 1.5 mm long that fly up in clouds from the leaf undersides when disturbed, with flat, oval, whitish-green scale-like nymphs stuck beneath the leaves. Black sooty mould grows on the honeydew. It matters more on collards than on headed cabbage, because it lives on the leaves you eat.
- Tolerate light numbers on the outer leaves, which do little harm to growth
- Pick off and bin the worst-infested lower leaves
- Encourage ladybirds and other natural enemies; the Encarsia formosa sold for greenhouse whitefly does not attack this species
Pest Harlequin Bug
Identification: Shield-shaped bugs about 1 cm (½ in) long, glossy black with bright red-orange markings, sucking sap and leaving pale white or yellow blotches on the leaves. The eggs sit in clusters that look like tiny black-and-white striped barrels.
- Hand-pick adults and nymphs into a jar of soapy water
- Crush egg clusters on the leaf undersides
- Clear crop remains and weeds after harvest, where adults shelter over winter
Disease Club Root Plasmodiophora brassicae
Symptoms: Stunted plants with purplish leaves that wilt in hot weather and recover when it cools. The roots swell into large, distorted clubs with few fine roots. Most infections happen from midsummer to late autumn.
Treatment: There is no cure and no chemical control for gardeners. Lift affected plants with as much root as you can and bin them rather than composting.
Prevention: Raise plants in pots of at least 9 cm (4 in) to a larger than usual size before planting out, lime acid soil to bring the pH to 7 or above (this reduces the disease but does not eliminate it), improve drainage, pull weeds such as shepherd's purse, and do not carry soil from infected beds on tools or boots. The spores survive in soil for up to 20 years.
Disease Black Rot Xanthomonas campestris pv. campestris
Symptoms: Yellow V-shaped patches spreading in from the leaf edges, with the veins inside them turning black. Leaves wilt, brown and drop, and a cut stem shows a black ring.
Treatment: There is no cure. Pull up and destroy badly affected plants, and remove spotted leaves from lightly affected ones in dry weather.
Prevention: Buy clean or hot-water-treated seed, keep brassicas off the same ground for at least 3 years, clear crop debris and cruciferous weeds, water at the base and avoid handling plants while they are wet.
Disease Downy Mildew
Symptoms: Yellow patches on the upper leaf surface with grey-white fuzz beneath, in cool, damp weather. Seedlings and young plants suffer most.
Treatment: Remove affected leaves and improve the airflow; older plants with a few spots usually grow on.
Prevention: Space plants well, water at the base in the morning and do not crowd seedlings.
Growing Conditions
| Min. soil temperature | 7 °C (45 °F) |
| Germination temperature | 10–30 °C (50–86 °F) |
| Base growth temperature | 4 °C (39 °F) |
| Min. daylength to start | 8.5 h |
| Photoperiod sensitivity | day neutral |
Frequently Asked Questions
- How far apart should I plant collard greens?
- Plant collard greens 45 cm (18 in) apart, with 60 cm (24 in) between rows.
- When can I harvest collard greens?
- Collard greens is ready to harvest approximately 55 days after transplanting.
- What grows well with collard greens?
- Collard greens grows well with onions, nasturtium, dill.
- Is collard greens frost hardy?
- Yes, collard greens is hardy.