Start with a satellite image or measurements for real dimensions. Place beds where they get most sun (south-facing). Make beds max 120 cm wide. Put tall crops on the north side. Leave paths 60 cm+ wide for wheelbarrow access. Use a spacing calculator to fill beds without overcrowding.
I used to plan my garden on graph paper. One square per 30 centimetres, coloured pencils for different crops, a ruler for the bed edges. It worked, sort of. But I could never quite see what the finished garden would look like. The paper showed me rectangles and labels. My brain had to do the rest.
The moment I switched to designing my layout digitally, with real dimensions and actual plant spacing, everything changed. I could see immediately when a bed was too narrow, when I had crammed too many tomatoes into a space, or when a path was going to be awkward to walk through with a wheelbarrow. And when I could preview the whole thing as an illustrated garden rather than a flat diagram, I started catching problems I would never have noticed on paper.
Here is how I design a garden layout now, step by step. Each section has a short video showing exactly what I mean.
Start with your actual garden shape
The biggest mistake I made with graph paper was guessing dimensions. I would pace out the garden, round everything to the nearest metre, and end up with a plan that did not quite match reality. Beds that were supposed to fit did not fit. Paths were tighter than expected.
Now I start with a satellite image. I search my address, find my garden from above, and draw directly on top of it. The aerial view gives me real-world scale without a tape measure. I can trace the fence line, mark where the shed is, and see exactly how much space I have to work with.
If you do not have satellite access or your garden is new (not yet visible on aerial images), you can skip this step and set dimensions manually. But for most established gardens, the satellite saves a surprising amount of time.
Place your beds
With the garden outline set, I add beds. This is where the layout starts taking shape.
I think about three things when placing beds:
Sun exposure. Beds for vegetables need the sunniest spots. In the northern hemisphere, that usually means the south-facing side of the garden, away from fences and buildings that cast shade.
Access. Every bed needs to be reachable from at least one side without stepping on the soil. I keep beds no wider than 120cm (about 4 feet). If a bed is against a wall, I keep it under 90cm so I can reach the back.
Paths. I leave at least 45cm between beds for walking, and 60cm or more on main routes where I need to get a wheelbarrow through.
For most vegetable gardens, rectangles work best. But if you have curved borders, an odd-shaped corner, or want a keyhole bed, the free-form tool lets you draw any shape.
Fill beds with plants
This is where a digital layout tool earns its keep. On graph paper, I had to look up every plant’s spacing, count squares, and hope I got it right. Now I drag a plant onto a bed and the spacing is calculated automatically. The tool shows me exactly how many tomatoes, lettuces, or beans fit in the space.
I usually start with the biggest plants first (tomatoes, courgettes, squash) because they take the most room. Then I fill remaining space with smaller crops. Each plant gets its own area within the bed, and new additions automatically fill whatever space is left.
Resizing plant areas
Sometimes the automatic fill is more than I want. Maybe I only need four tomato plants, not eight. I click the plant area and drag the handles to resize it. The count updates as I go.
Non-rectangular planting patterns
Not everything grows in neat rectangles. Flower borders, companion planting strips, and curved edges work better with a plant path. I draw a line through the bed and drag plants onto it. They space themselves along the curve.
Add trees and permanent plants
Fruit trees, berry bushes, and perennial herbs do not live in beds. They go wherever they grow in the garden. I drag them directly onto the canvas and position them where they actually are (or where I plan to plant them).
This is something I could never do well on graph paper. A fruit tree’s canopy might span 4 metres, and I need to see how it interacts with the beds below it. Will it shade my tomatoes by July? Is it too close to the fence? The visual layout makes these questions obvious.
Add pots and containers
I grow herbs and chillies in pots on the patio. These are part of the garden too, and I want them in my layout so I do not forget about them when planning.
Define the boundaries
Walls, fences, and hedges frame the garden. Adding them to the layout helps me see the full picture and plan for things like espaliered fruit trees against a south-facing wall, or climbers on a fence.
Add paths and ground textures
Paths tie the layout together. I draw them between beds to show where I walk, and add textures (gravel, paving, mulch) to mark different zones.
See your garden come to life
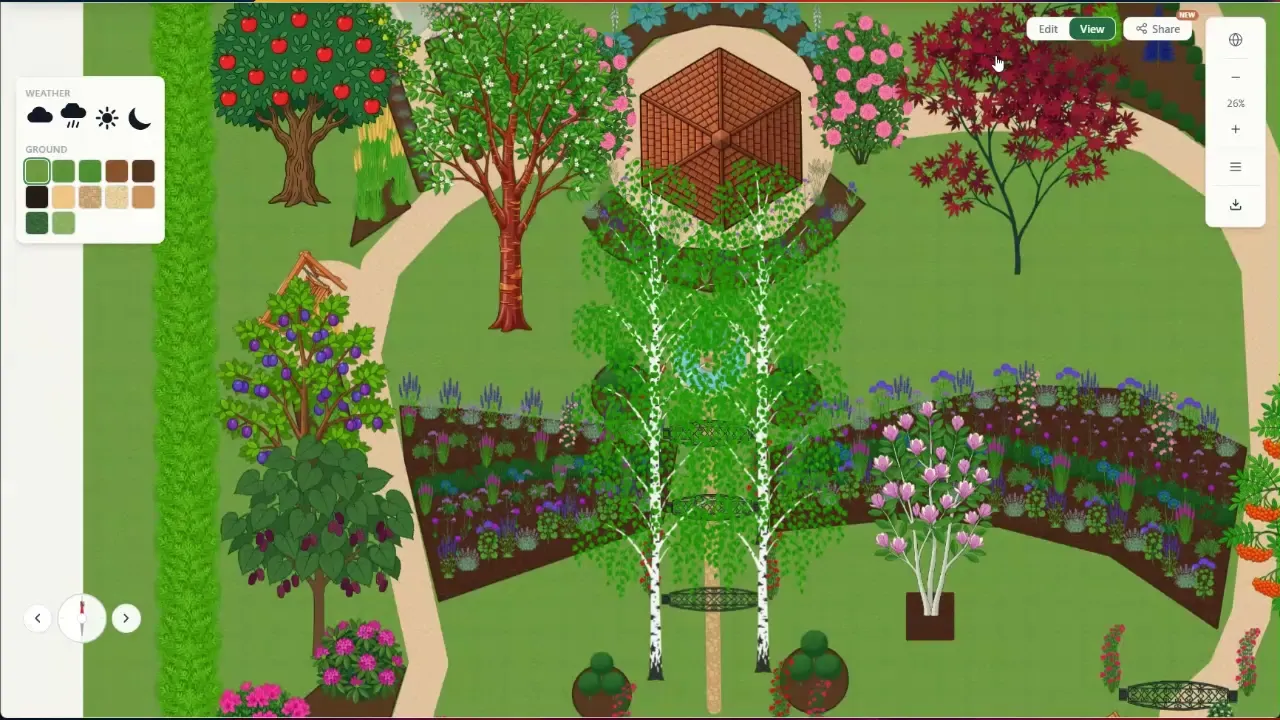
This is the part that makes the whole process worth it. Once the layout is done, I switch to view mode and the flat diagram transforms into a lush, illustrated garden. Every plant renders at its actual size. Trees have canopies. Flowers bloom. The whole thing looks like a real garden seen from above.
This is where I catch the last problems. A bed that looked fine as a rectangle suddenly looks overcrowded when I can see the actual plants. A tree canopy overlaps a bed more than I expected. The path between two beds looks too narrow when there are full-grown courgettes spilling over the edges.
I rotate the view, zoom in on different sections, and adjust anything that does not look right. Then I go back to edit mode, make changes, and preview again. It takes a few iterations, but the result is a layout I am genuinely confident about before I put a spade in the ground.
Share your design
Once I am happy with the layout, I share it. Sometimes with my partner so we can discuss what goes where. Sometimes with gardening friends who want to see what I am planning. The shared link lets anyone view the design without needing an account.
Tips I have learned from designing layouts
After several seasons of planning this way, a few things have stuck:
Design in winter. The best time to plan a garden layout is when nothing is growing. You can think clearly about space without being distracted by what is already there.
Start with infrastructure, end with plants. Get the beds, paths, and boundaries right first. Plants are easy to move around. Beds are not.
Do not fill every space. Leave room for paths, for kneeling, for that wheelbarrow. A garden that looks full on the plan will feel cramped in reality.
Use the preview to check shade. Tall plants and trees cast shadows. The illustrated view makes it obvious when something tall is going to shade something that needs full sun.
Save your layout each year. Even if you change things, having last year’s layout helps you remember what worked and what did not. It also helps with crop rotation if you grow vegetables.
The tools I use for this are part of Leaftide’s plot designer. The free tier covers everything shown in this article. If you have never designed a garden layout digitally before, it is worth trying even once, just to see your garden from a perspective that graph paper cannot give you.