| Rootstock type | Spacing | Example |
|---|---|---|
| Very dwarf (M27) | 1.5-2m | Pots, tiny gardens |
| Dwarf (M9) | 2.5-3m | Small gardens, intensive planting |
| Semi-dwarf (M26) | 3-4m | Most home orchards |
| Semi-vigorous (MM106) | 4-5m | Larger gardens |
| Vigorous (M25/seedling) | 6-8m | Meadow orchards |
I have planted fruit trees in the wrong place more than once. The first time, I put two apple trees three metres apart without checking the rootstock. They were on MM106, semi-vigorous. Within four years the canopies were tangled together, neither tree was getting enough light on the lower branches, and pruning became a battle I was always losing.
The second mistake was subtler. I planted a pear against a north-facing fence because that was where I had space. It grew fine. It just never fruited properly, because pears want sun and warmth, and I gave it neither.
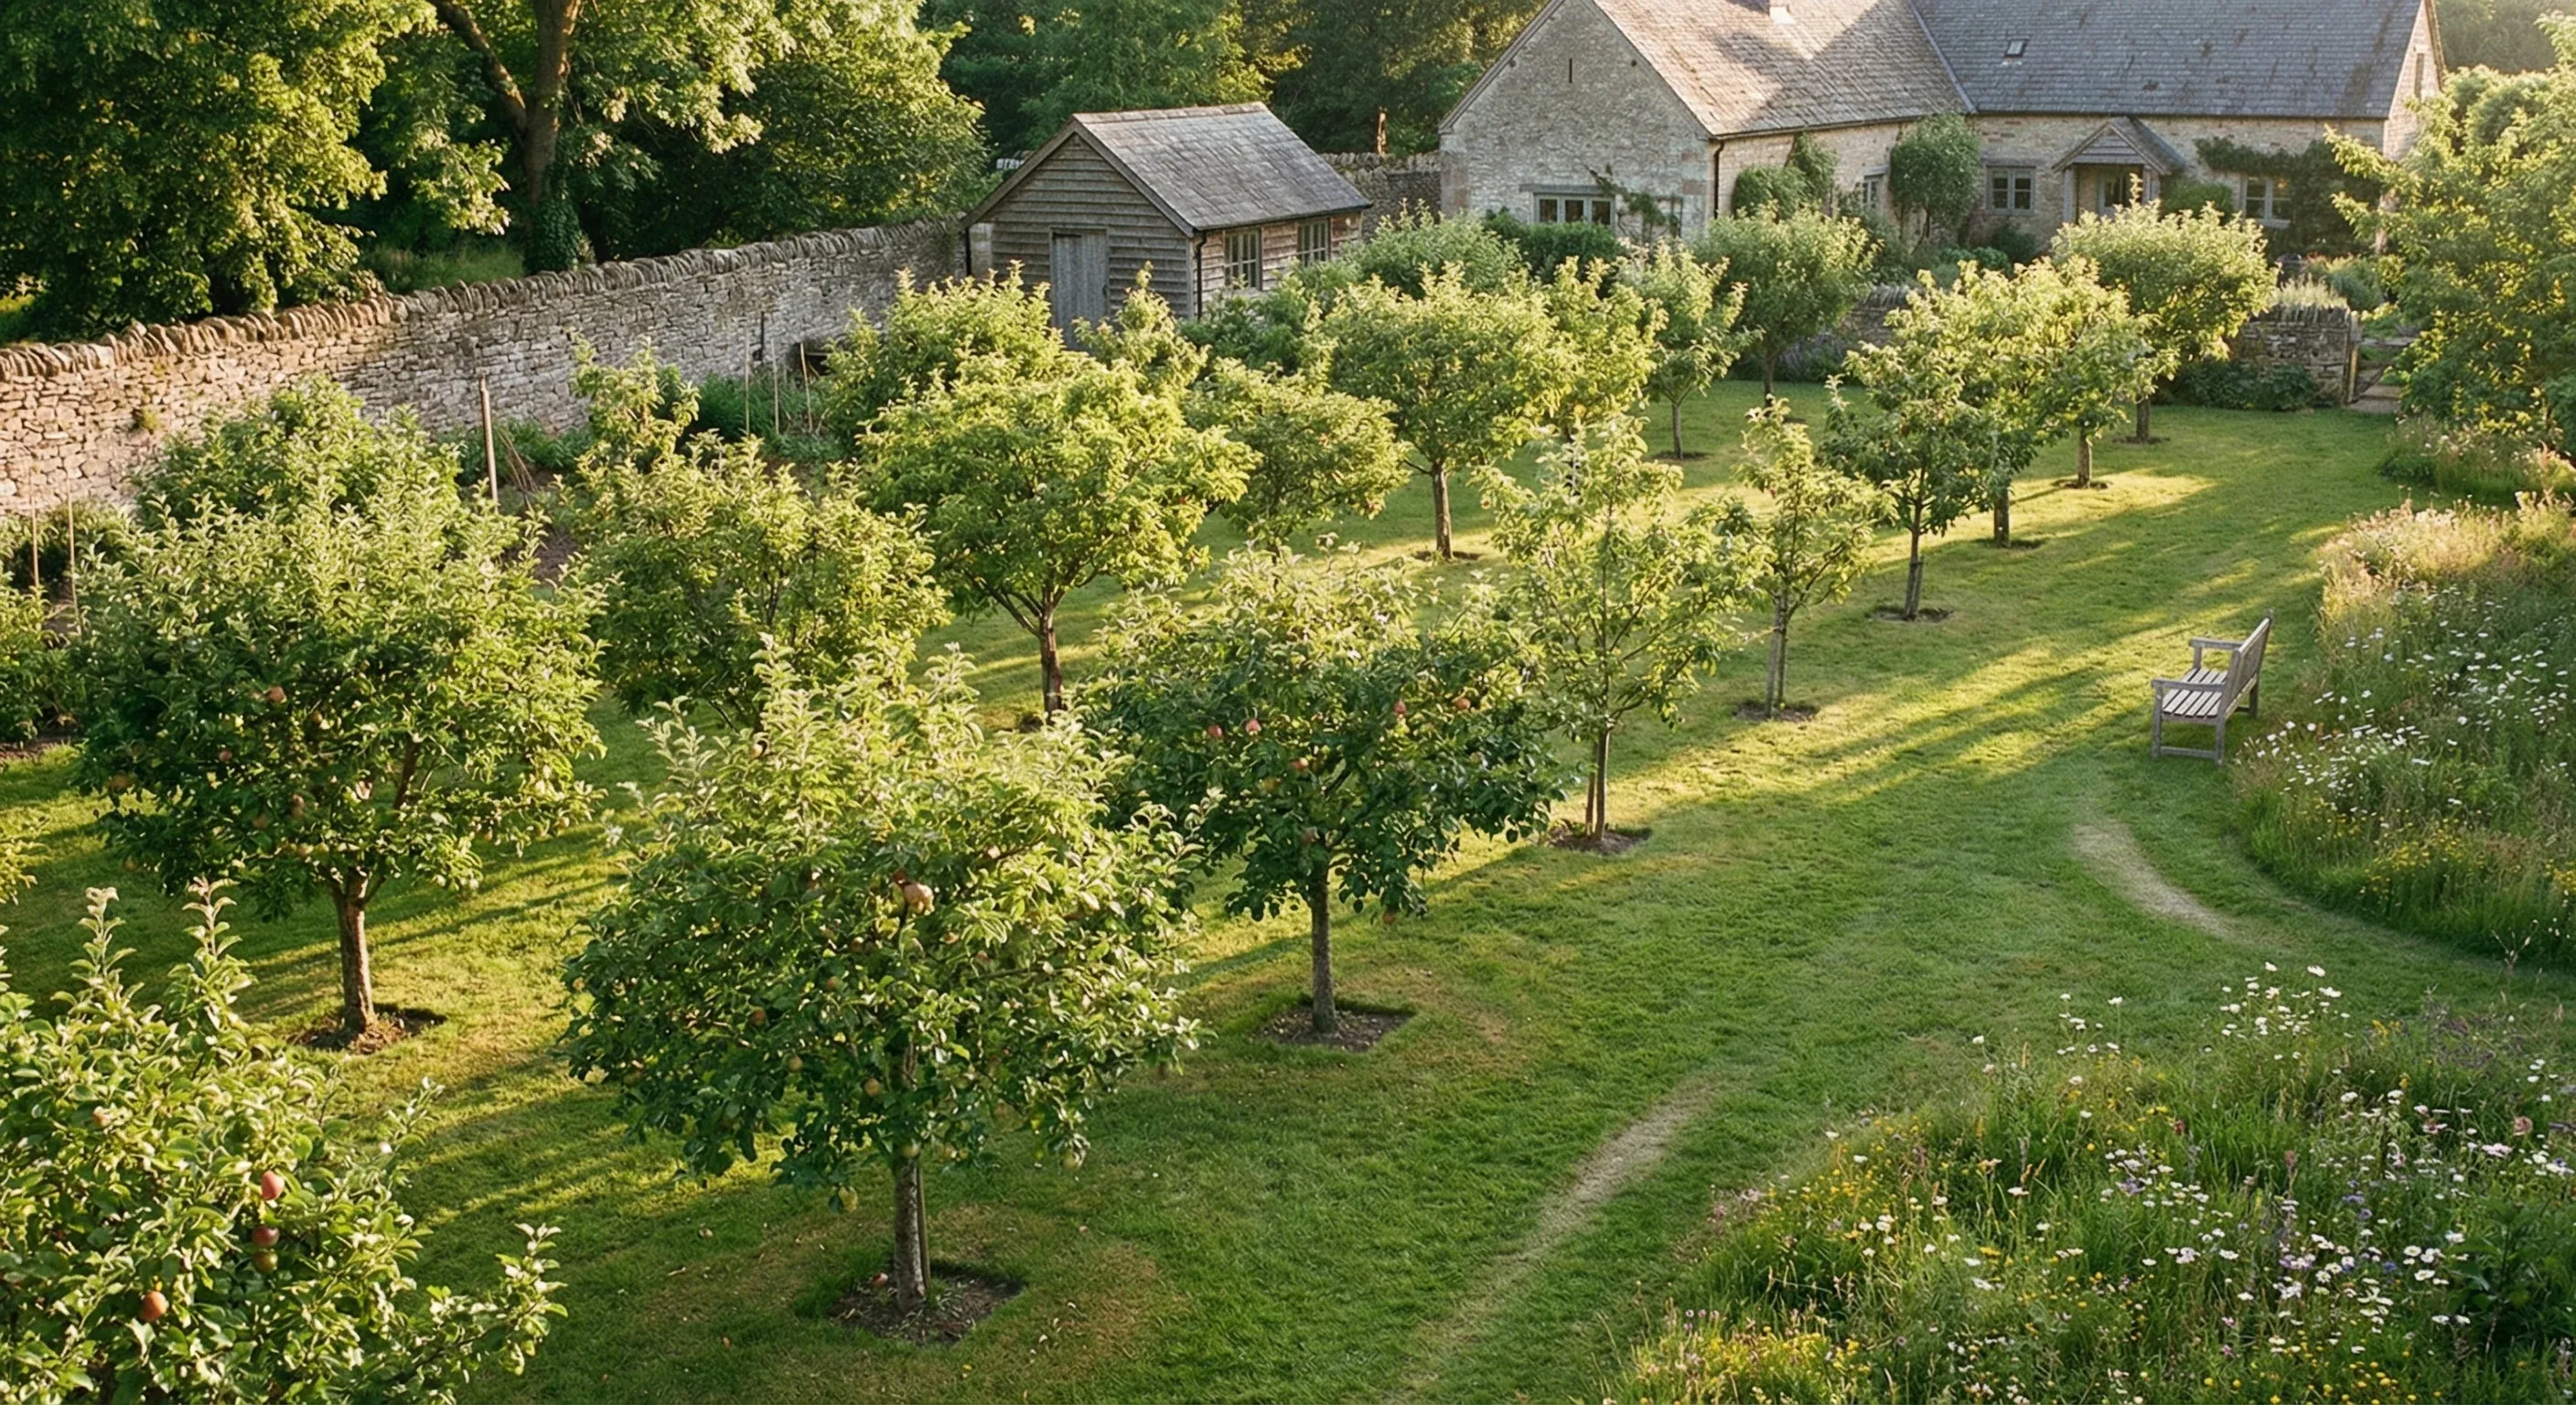
Orchard layout is one of those things that feels like it should be simple. You dig a hole, you plant a tree. But the decisions you make at planting time, how far apart, which direction the rows run, what goes where, those decisions shape your orchard for decades. Getting them right is not difficult. It just requires thinking about a few things before the spade goes in.
Rootstock determines everything
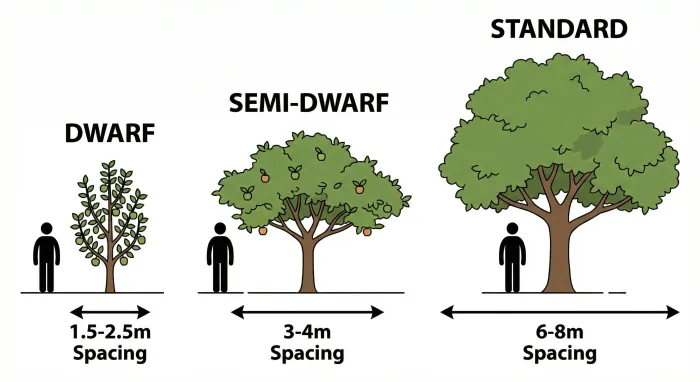
The single most important factor in fruit tree spacing is rootstock. Not the variety, not the soil, not the climate. Rootstock.
Every grafted fruit tree has two parts: the variety on top (the bit that produces the fruit you want) and the rootstock below (which controls how big the tree grows). The same apple variety grafted onto a dwarfing rootstock might reach two metres tall. On a vigorous rootstock, it could reach six or seven metres. The spacing has to match.
This is where most home orchardists go wrong. They buy a tree labelled “apple” without noting the rootstock, plant it at a generic distance, and then spend years dealing with a tree that is either too big for the space or too small for the gap.
Apple rootstock spacing
| Rootstock | Final height | Spacing | Best for |
|---|---|---|---|
| M27 (very dwarf) | 1.5-2m | 1.5-2m | Pots, tiny gardens |
| M9 (dwarf) | 2-3m | 2.5-3m | Small gardens, intensive planting |
| M26 (semi-dwarf) | 3-4m | 3-4m | Most home orchards |
| MM106 (semi-vigorous) | 4-5m | 4-5m | Larger gardens, traditional orchards |
| M25/seedling (vigorous) | 5-8m | 6-8m | Meadow orchards, farmland |
M26 is the sweet spot for most home orchards. The trees are manageable for pruning from the ground or a short stepladder, they produce well, and they fit comfortably in a medium-sized garden. M9 is better if space is tight, but dwarf trees need permanent staking and good soil because the root system is small.
Pear rootstock spacing
Pears are simpler. Most are grafted onto Quince A (semi-vigorous, 3-5m spacing) or Quince C (semi-dwarf, 2.5-3.5m spacing). A few older trees might be on pear seedling rootstock, which produces a large standard tree needing 6m or more.
Stone fruit spacing
Plums, cherries, and damsons have their own rootstock systems. Pixy keeps plums compact at 3-4m spacing. St Julien A is semi-vigorous at 4-5m. For cherries, Gisela 5 is the dwarfing option at 3-4m, while Colt produces a larger tree needing 5-6m.
Peaches and nectarines are usually on St Julien A and need 4-5m, though many home growers train them as fans against a south-facing wall, which changes the spacing equation entirely.
Always Check the Label
When you buy a fruit tree, the rootstock should be on the label or in the product description. If it is not listed, ask the nursery. Planting without knowing the rootstock is like buying a car without knowing the engine size. You need that information to plan properly.
Plan your orchard spacing before the spade goes in.
Free for up to 30 plants. No card needed.
Orientation and sunlight
Once you know how far apart your trees need to be, the next question is which direction to run the rows.
The standard advice is to orient rows north-south. This way, both sides of each tree get direct sunlight as the sun moves from east to west through the day. East-west rows mean the north side of each tree is permanently shaded by the tree to its south, which reduces fruiting on that side.
For most home orchards, this is good guidance but not a rigid rule. If your garden is long and narrow running east-west, you work with what you have. A slightly off orientation is far better than cramming trees too close together to fit a north-south layout.
What matters more than row direction is avoiding shade from buildings, fences, and large existing trees. Fruit trees need a minimum of six hours of direct sun during the growing season to crop well. Apples and pears tolerate light shade. Plums and cherries want more sun. Peaches and figs need the warmest, sunniest spot you have.
Before you plant, spend a day watching where the shadows fall in your garden. Morning shade is less of a problem than afternoon shade. A spot that gets sun from midday onwards is usually fine. A spot shaded from 2pm is not ideal for fruit.
Planning a small orchard layout
Most home orchardists are not working with acres of land. They have a back garden, maybe 10 by 15 metres, and they want to fit in as many productive trees as possible without creating a jungle.
Here is how I would approach it.
Start with the boundaries
Walk the perimeter of your space. Note which fences or walls face south or west. These are prime spots for trained fruit: espaliers, fans, or cordons. A south-facing fence with an espalier pear or a fan-trained peach is one of the most productive uses of garden space. The wall provides warmth, shelter, and reflected heat, and the tree takes up almost no ground space.
Cordons are even more space-efficient. A cordon apple is a single stem planted at 45 degrees, spaced just 60-90cm apart. You can fit six or eight along a fence that would only accommodate one or two freestanding trees. The yield per tree is lower, but the yield per metre of fence is excellent.
Place freestanding trees next
With the boundaries planned, look at the open ground. Place your largest trees first, the ones on semi-vigorous or semi-dwarf rootstock. Give them their full spacing. Then see what space remains for smaller trees or soft fruit underneath.
A common layout for a small garden orchard:
- Two or three apple trees on M26 (3.5m apart) as the backbone
- One plum on Pixy (3m from the nearest apple)
- A fan-trained cherry or peach on the sunniest wall
- Cordons along a side fence for extra varieties
This gives you four or five different fruits from a space that might only be 10 by 8 metres.
Think about access
You need to reach every tree for pruning, spraying, and picking. Leave at least 1.5 metres of clear space around each tree for a stepladder. If you are using a wheelbarrow for mulching or compost, make sure you can get it between the trees without scraping bark.
I have seen orchards where the trees were perfectly spaced but impossible to maintain because there was no path wide enough to carry a ladder through. Plan your access routes before you plant, not after.
Pollination and layout
Spacing affects more than canopy size. It affects pollination, and pollination determines whether you get fruit.
Most apples and sweet cherries need a compatible pollination partner. The partner needs to be a different variety in the same or adjacent pollination group, and it needs to be close enough for bees to travel between them. In practice, that means within about 15-20 metres.
For a home orchard, this is rarely a problem if you are planting two or more apple trees. But if you only have room for one, check whether a neighbour has an apple tree, or plant a crab apple nearby. Crab apples are universal pollinators for most apple varieties and take up very little space.
Pears are fussier. They need a partner from a compatible pollination group, and the overlap in flowering time matters more than with apples. Conference is partially self-fertile, which is why it is the most popular garden pear, but it still crops better with a partner like Williams or Concorde.
Plums vary. Victoria, the most common garden plum, is self-fertile. So are most damsons and gages. But if you want a Marjorie’s Seedling or a greengage, check whether it needs a pollinator.
When you are laying out your orchard, keep pollination partners within sight of each other. Do not put one apple at the front of the garden and its pollinator at the back behind a shed. Bees will find them eventually, but closer is better.
Pollination Groups Matter
Two apple trees of the same variety will not pollinate each other. You need different varieties in compatible pollination groups. A Bramley (triploid) needs two other pollinators nearby. Check pollination compatibility with the Pollination Checker before you buy, not after you have planted.
Trained forms: more trees in less space
If your garden is too small for freestanding trees at full spacing, trained forms are the answer. They are not a compromise. Some of the most productive home orchards I have seen are entirely trained trees.
Cordons. Single-stemmed trees planted at 45 degrees, 60-90cm apart. Perfect for apples and pears along a fence or on a post-and-wire system. You can fit 8-10 varieties in the space of two freestanding trees. Pruning is simple: summer prune the side shoots in August.
Espaliers. Horizontal tiers trained along wires, usually against a wall. Each tier extends about 45cm above the last. A mature espalier can be 2-3 metres wide and 2 metres tall, flat against the wall. Stunning to look at and very productive. Apples and pears are the classic choices. The espalier training guide covers the process in detail.
Fan-trained. Branches radiate from a short trunk like the ribs of a fan. This is the standard form for stone fruit against a wall: cherries, plums, peaches, apricots. A fan needs about 3-4 metres of wall width and 2-2.5 metres of height.
Stepovers. Single-tier espaliers, just 40-50cm tall, used as edging along paths or beds. They produce a surprising amount of fruit for their size and double as a garden feature. Apples on M27 are the usual choice.
Trained trees need more pruning than freestanding ones, but the pruning is straightforward once you learn the system. The payoff is worth it: you can grow six, eight, even ten varieties in a space that would only fit two or three bush trees.
Common layout mistakes
I have made several of these. Some took years to become obvious.
Planting too close because the trees look small. A bare-root whip is a stick. It is hard to imagine it as a four-metre tree. But it will get there, and when it does, you cannot move it. Always space for the mature size, not the size at planting.
Ignoring the rootstock. Two apple trees can need anywhere from 1.5 to 8 metres of spacing depending on rootstock. “Apple tree spacing” without knowing the rootstock is a meaningless question.
Forgetting about the south side. In the northern hemisphere, the south side of your orchard gets the most sun. Put your most sun-hungry trees there: peaches, figs, apricots. Put the more shade-tolerant ones (cooking apples, damsons) on the north side.
Not accounting for existing shade. That mature oak at the bottom of the garden casts a shadow that moves through the year. In midsummer it might not reach your orchard. In spring, when your trees are flowering and need pollinators, it might shade half the plot. Observe shadows across seasons, not just on the day you are planning.
Planting everything at once. There is no rule that says you have to plant your entire orchard in one go. Plant two or three trees this winter. See how they establish. Learn from any mistakes. Add more next year. A phased approach costs nothing extra and reduces the risk of repeating an error across every tree. The first year fruit tree care guide covers what to focus on in that initial season.
Recording your layout
An orchard layout is a long-term document. You will refer to it for years, every time you prune, every time you consider adding a tree, every time you wonder which variety is which.
At minimum, record the position of each tree, its variety, rootstock, and planting date. A simple sketch with measurements works. So does a photo of the garden with trees marked on it. The orchard record keeping guide covers what else is worth tracking beyond the layout itself.
The plot designer in Leaftide is built for exactly this. You can place each tree, record the variety and rootstock, and see the spacing visually. When you add a new tree three years from now, you can check the layout before you dig. It is the kind of thing that seems unnecessary when you plant your first tree and becomes essential by the time you have six or seven.
If you are tracking care tasks too, pruning dates, feeding schedules, spray records, having each tree as a permanent entry means you build a history over time. That history is what tells you whether your Bramley responds better to winter or summer pruning, or whether your Conference pear fruits more heavily in years when you fed it in March.
Your orchard is a 20-year project. Your memory is not.
Free for up to 30 plants. No card needed.
Putting it together
Orchard layout comes down to three things: know your rootstocks, give each tree the space it needs, and think about sun and pollination before you plant.
For a small garden, the combination of a few freestanding trees on dwarfing rootstock plus trained forms along fences and walls gives you the most variety and the best use of space. Do not try to fit standard trees into a small plot. Choose the right rootstock for your space and you will not spend the next decade fighting overgrown canopies.
If you want to check spacing for specific rootstocks, the Spacing Calculator handles fruit trees as well as vegetables. And if you are still deciding which varieties to grow, check pollination compatibility before you order. Getting that wrong is an expensive mistake that takes years to discover.
The best time to plan an orchard layout is before you plant. The second best time is now, while you can still move the young trees if you got it wrong.
The Plot Designer guide shows you how to set up your garden map and place trees with real spacing — useful if you have not used the visual planner before.