How to Grow Alstroemerias
Alstroemeria
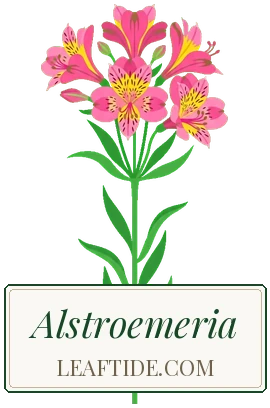
Grow alstroemerias for one season and clear it afterwards, or leave it in the ground to come back year after year. This guide covers both.
 In your Leaftide garden
- Species
- Alstroemeria
- Light
- Full sun to part shade
- Water
- Moderate
- Height
- 80 cm (31 in)
- Spread
- 50 cm (20 in)
- Spacing
- 30 cm (12 in)
- Sow depth
- 1 cm (½ in)
- Germination temperature
- 18–22 °C (64–72 °F)
Pet Safety
Two ways to grow alstroemerias
Care either way
Give them free-draining soil
Alstroemerias hate sitting in wet soil. On heavy clay, dig in plenty of grit and compost before planting, or grow them in a raised bed or a pot of gritty compost.
Feed lightly
Give a balanced liquid feed while the plants are in flower. Too much feed, especially nitrogen, makes soft, floppy stems and fewer flowers.
Stake tall varieties
Tall varieties flop in wind and rain. Put in a ring support or a grid of twine and canes early, before the stems lengthen, so they grow up through it.
Pests & Diseases
Pest Slugs and Snails
Identification: Ragged holes and grazed tips on the young shoots as they push through in spring, with slime trails on the soil around the clump. Newly planted clumps suffer most.
- Check emerging shoots on mild, damp evenings and pick off slugs and snails by torchlight.
- Set beer traps, or scatter ferric phosphate pellets thinly, around young clumps in spring.
Pest Red Spider Mite
Identification: Fine pale mottling on the leaves, which turn dull and bronzed, with fine webbing in bad attacks. Mostly a problem in hot, dry conditions, in pots and under glass.
- Keep potted plants well watered and damp down the greenhouse in hot weather, since the mites thrive in dry air.
- Under glass, release the predatory mite Phytoseiulus persimilis as soon as you see the first mottling.
Disease Root Rot
Symptoms: Shoots yellow, wilt and collapse, and the fleshy roots are brown and soft when lifted. Most likely after a wet winter in heavy soil, or in pots left standing in cold, wet compost.
Treatment: Lift the clump, cut away soft, rotten roots and replant any firm, healthy pieces in a better-drained spot or in fresh, gritty compost.
Prevention: Plant only in free-draining soil, mix grit into pot compost (about a fifth by volume) and bring pots under cover for winter.
Disease Viruses
Symptoms: Yellow mottling, streaks or mosaic patterns on the leaves, sometimes with distorted growth, and plants that gradually lose vigour and flower less.
Treatment: There is no cure. Dig up badly affected plants, put them in household waste, and don't divide or propagate from them.
Prevention: Buy plants from a reliable supplier and keep aphids in check, as they spread some of these viruses from plant to plant.
Way 1
Growing it for one season
Peruvian lilies thrive in full sun (or light shade) and freely drained, fertile soil with shelter from cold winds. Raise them from seed under cover or buy young plants, plant out after the last frost and stake tall varieties. Through summer, cut spent flower stems at the base to keep new ones coming, and feed every two weeks once they flower. Clear the plants when flowering tails off in autumn or the first frost blackens them. They make excellent cut flowers, lasting two weeks or more in a vase.
What changes this way
- Hardiness
- Half Hardy
- Feed
- Dig in compost before planting
When to Start
Sow indoors 7 weeks before last frost, or direct sow outdoors after frost risk has passed and soil reaches 10 °C (50 °F).
Don't know your frost date? Find it here →
Growth Stages
Approximate days from start
- Sow indoors
- —
- Transplant out
- —
- First harvest
- —
Want your full season plan with reminders? Set up your garden free


Tips for one season
Cut stems at the base
Cut spent and picked stems off right at the base. Pulling suits established clumps, but in a plant's first summer it can tear the young roots, and a plant grown for one season is always in its first summer.
Clear at the end of the season
When flowering tails off in autumn or the first frost blackens the leaves, pull up the plants and compost the healthy growth. Bin any plant with virus symptoms (yellow streaks or mottling).
Questions about growing it for one season
- How far apart should I plant alstroemerias?
- Plant alstroemerias 30 cm (12 in) apart, with 45 cm (18 in) between rows.
- When does alstroemerias flower?
- Alstroemerias typically flowers approximately 75 days after transplanting.
- Is alstroemerias frost hardy?
- Only partly: alstroemerias is half-hardy.
Pests and diseases this way
Pest Aphids
Identification: Clusters of green or black insects on shoot tips and flower buds. Sticky honeydew and distorted growth.
- Blast off with a strong jet of water
- Encourage ladybirds and lacewings
- Spray with insecticidal soap
- Spray with a pyrethrin-based insecticide if infestations are severe
Disease Grey Mould Botrytis cinerea
Symptoms: Fuzzy grey fungal growth on flowers, stems, and leaves, especially in damp conditions. Affected tissue turns brown and rots.
Treatment: Remove and destroy affected material promptly. Improve air circulation around plants.
Prevention: Avoid overhead watering. Space plants well. Remove dead foliage promptly. Ensure good ventilation under glass.
Way 2
Leaving it in the ground
Alstroemerias are tuberous herbaceous perennials that flower prolifically from early summer to mid-autumn. Plant in full sun or light shade in well-drained, fertile soil with shelter from cold winds. Pull spent stems from the base (never cut) to encourage continuous flowering. Mulch in spring and feed monthly during flowering. They take a year to establish but then reward with years of abundant blooms and excellent cut flowers.
What changes this way
- Feed
- Balanced liquid feed monthly during flowering
- Winter
- Modern varieties are hardy. Mulch crowns with compost or straw in the first winter after planting and in very cold areas.
Yearly Lifecycle
Care Requirements
Light
Full sun or light shade
Best flowering in full sun. Tolerates light shade but produces fewer blooms. Shelter from cold winds.
Watering
Moderate, consistent moisture
Water regularly during the growing season. Avoid waterlogging which rots the tuberous roots. Reduce in winter.
Fertilizing
Monthly liquid feed during flowering
Balanced liquid fertiliser monthly from early summer to early autumn. Mulch with compost in spring for soil enrichment.
Pruning
Pull, never cut, spent stems
Pull spent flower stems from the base throughout summer to encourage continuous flowering. Never use secateurs as pulling stimulates new shoots from below.
Tips for leaving it in the ground
Cut, don't pull, in the first summer
Pulling stems is right on an established clump, but in the first summer after planting the RHS advises cutting flower stems instead, until the tubers are firmly rooted. That way you don't disturb the young roots.
Buy potted plants, not dry tubers
Dry tubers sold like bulbs often fail to grow. Container-grown plants, planted in spring or autumn while the soil is warm and moist, establish far more reliably.
Divide gently in spring
Lift and divide clumps every few years in spring to keep them flowering strongly. The fleshy roots snap easily, so dig wide, handle them carefully and replant the divisions straight away.
Bring pots under cover for winter
Roots in a pot are far more exposed to cold than roots in the ground, and winter rain leaves the compost sodden. Move containers to a frost-free porch or greenhouse until spring.